

Onboarding and site setup
The three step wizard, what Certaria builds in your SharePoint site, and where your live policies are meant to live.
Audience: ISMS Admin. Run this once, with the same account that installed Certaria.
How long: about fifteen minutes, plus a minute or two of waiting.
Before you begin
Section titled “Before you begin”Have to hand:
-
Company name, exactly as it should appear in policies and reports.
-
Your registered office address.
-
Your industry and approximate employee count.
-
The email address of your ISMS administrator.
-
Your ISMS scope statement, in one plain sentence. You can refine it later.
-
Your Cyber Essentials status, if you hold it.
-
The URL of the SharePoint site where your ISMS should live, for example
https://contoso.sharepoint.com/sites/Certaria. Create a new Communications site for this and use nothing else. When SharePoint asks you to choose a template for the new site, pick the Standard communication site (the plain one), not one of the themed Microsoft templates such as Learning central or Crisis management. Those arrive with pre-built pages, sample news and their own navigation, all of which then sit alongside what Certaria builds and confuse the result. Certaria brings the home page, navigation and branding itself; it needs an empty stage, not a furnished one.The same logic is why the site must be dedicated. Certaria never deletes or overwrites anything already on a site (it only adds), but it does add its libraries, lists and navigation links to whatever site you point it at, and there is no tidy way to remove them afterwards. Point it at a site that is already busy and your ISMS ends up mixed into someone else’s content, with Certaria’s navigation competing with what was already there. A site of its own also means you can show an auditor round without unrelated material in view.
Company name, registered address, industry, ISMS administrator email and the scope statement are all required before the wizard will let you continue.
Open the wizard
Section titled “Open the wizard”-
Open the Certaria ISMS Management Hub app.
-
On a fresh environment the Home screen tells you Certaria has not been configured in this environment yet. Select Open Certaria Onboarding. If that screen does not appear, open Certaria Onboarding directly from your apps list: both doors lead to the same place.
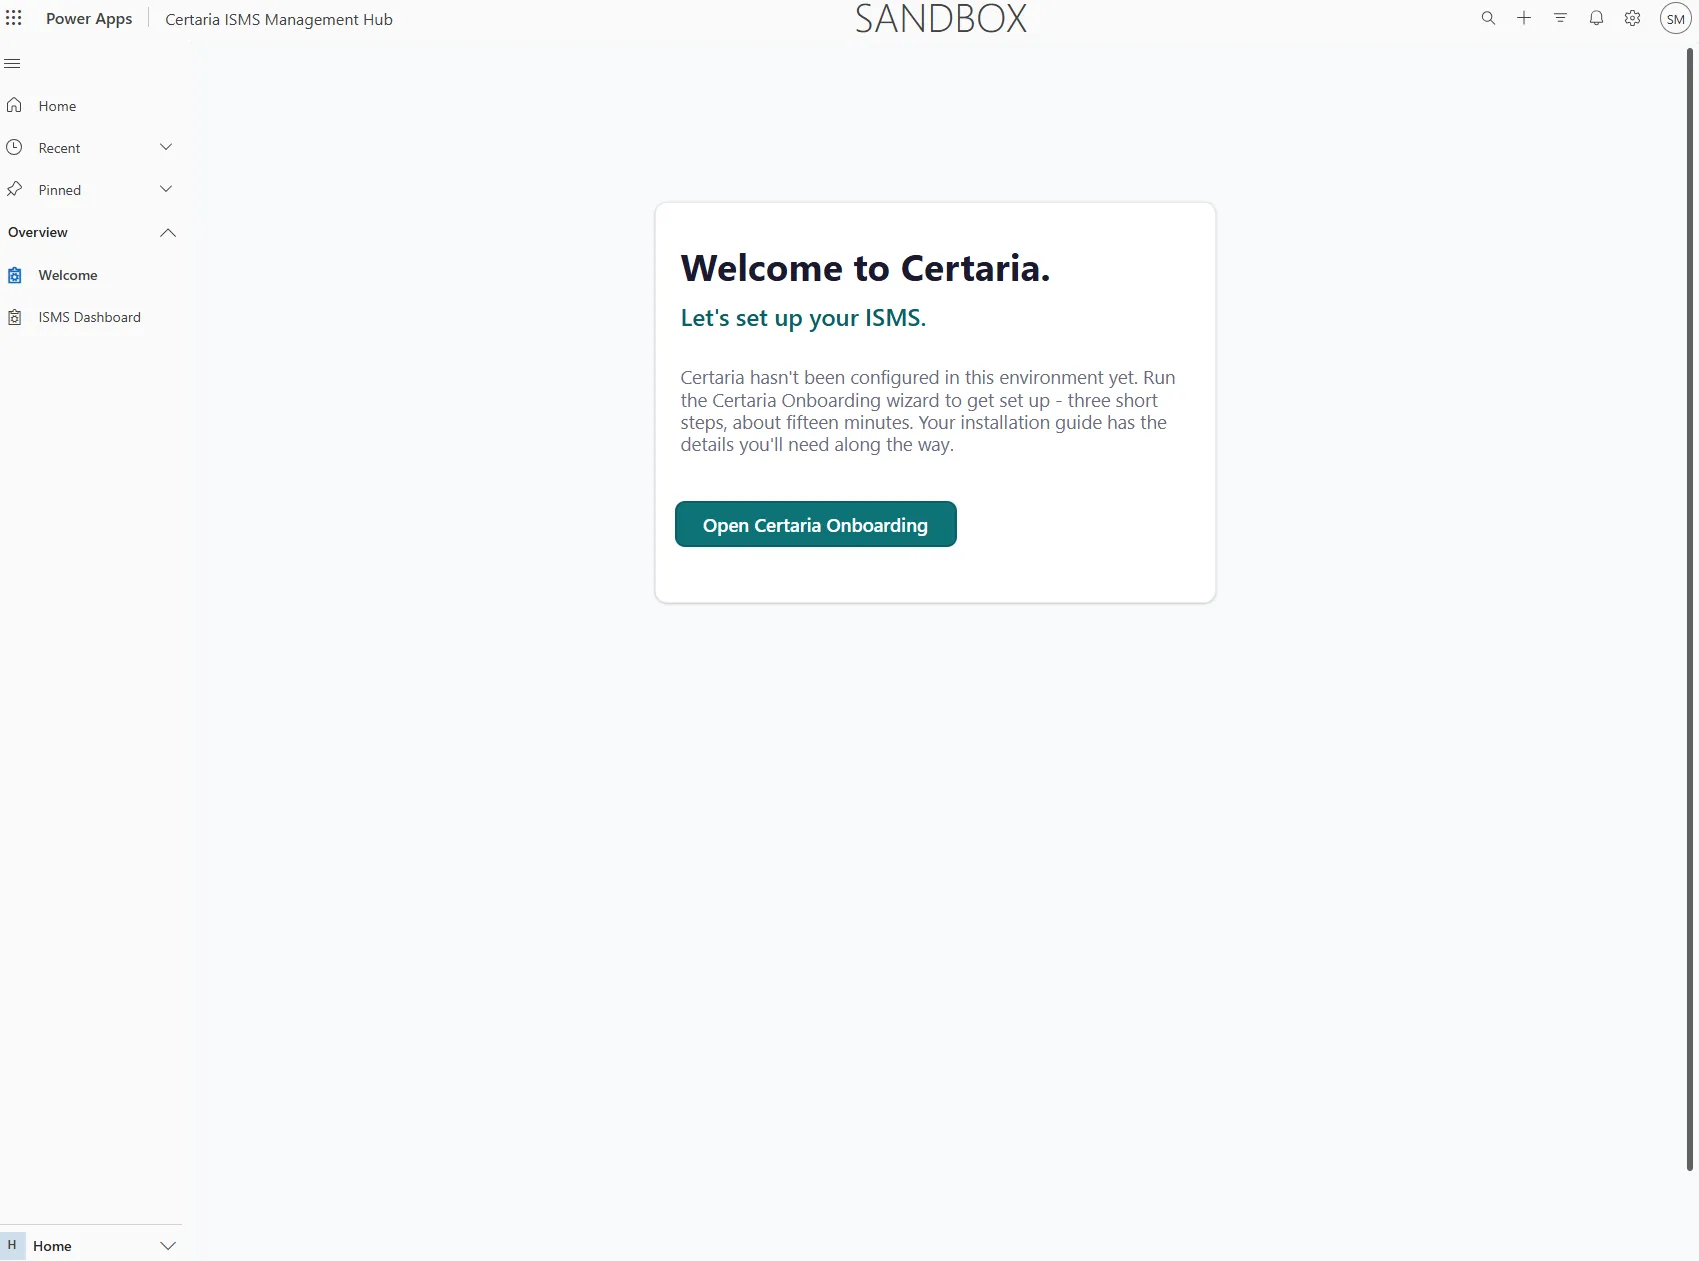 The hub tells you plainly that nothing is configured yet, rather than showing you an empty dashboard.
 -
The Welcome screen summarises the three steps. Select Start setup.
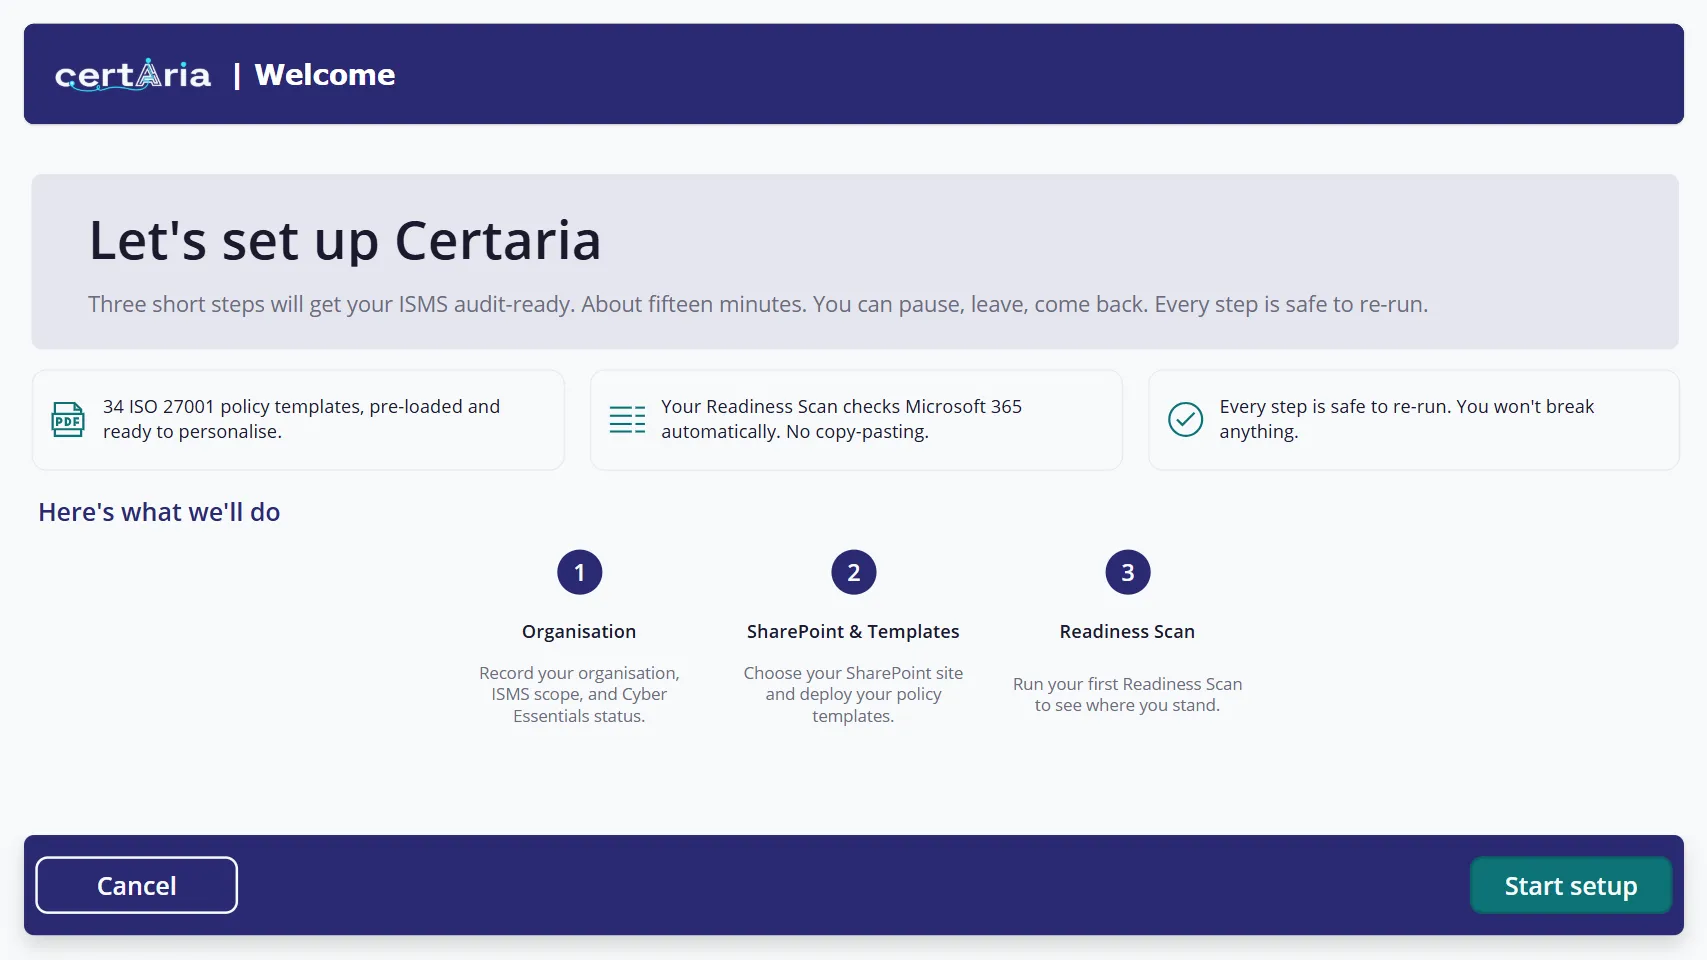 Three steps, about fifteen minutes, and every step is safe to re-run.
 -
First launch setup runs for under a minute. It prepares environment settings and switches on Certaria’s workflows, then the wizard reloads itself.
Step 1: your organisation
Section titled “Step 1: your organisation”Enter your company name, registered address, industry, approximate employee count, ISMS administrator email and scope statement, then record your Cyber Essentials status.
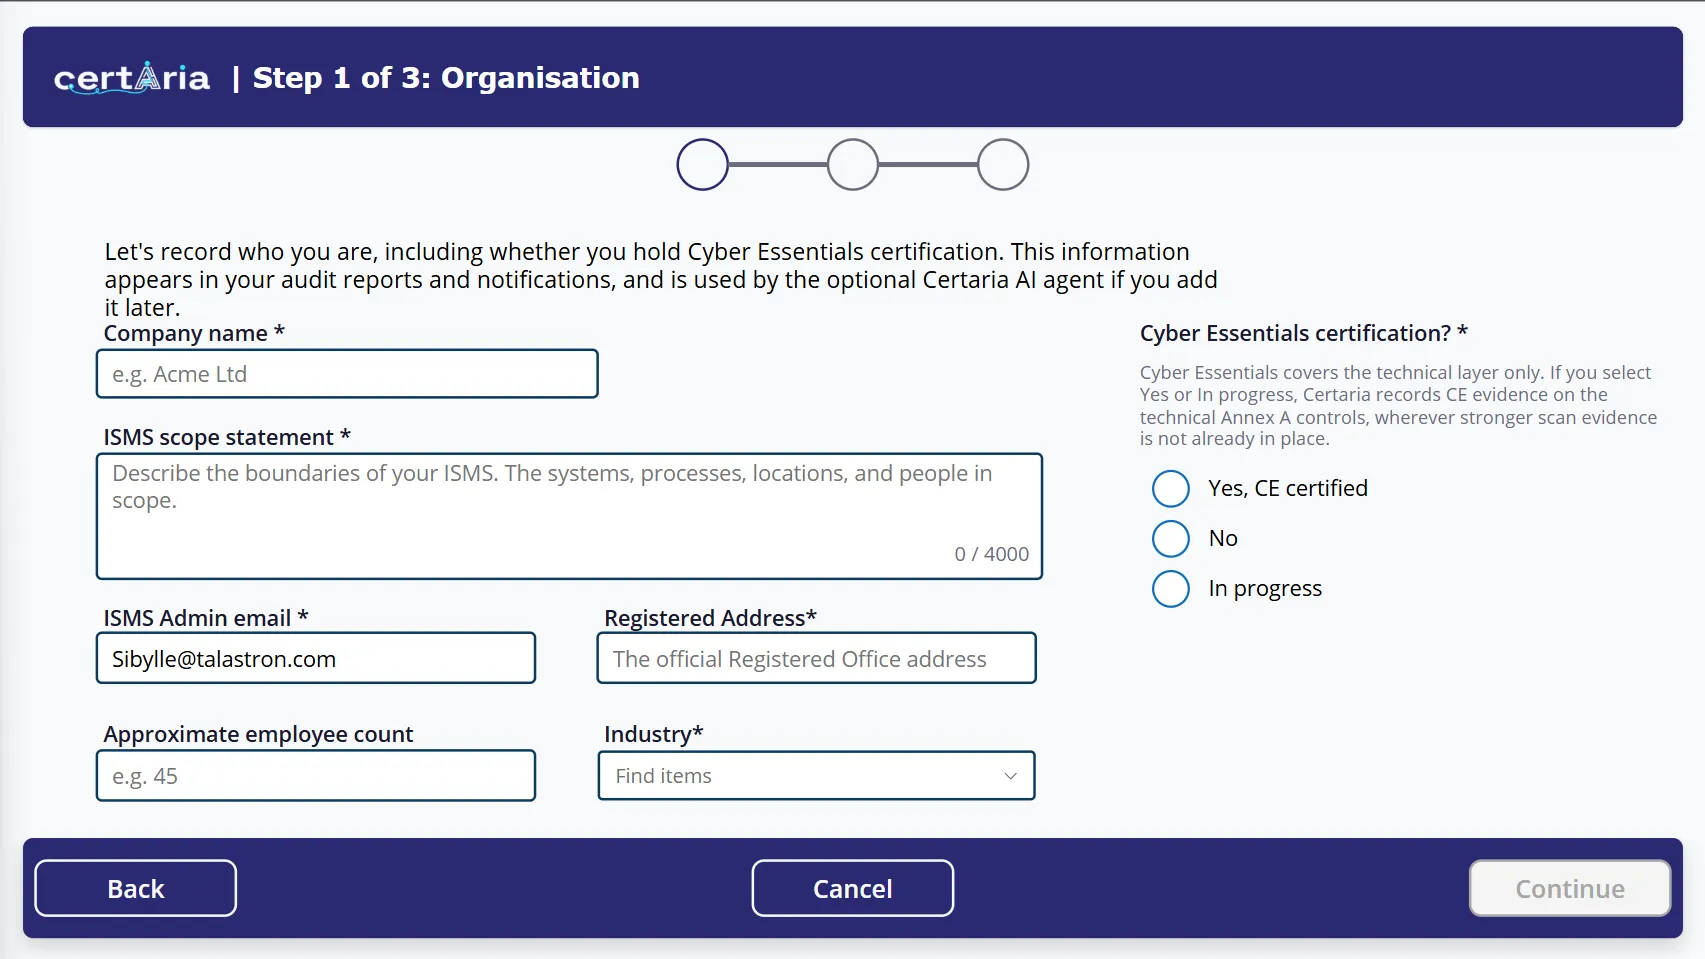 Fields marked with an asterisk are required. Approximate employee count is the only one on this screen that is not.
Cyber Essentials is worth answering accurately. It covers aspects of 14 ISO 27001 Annex A controls, and answering Yes or In progress marks those 14 as Partially evidenced, so you are not asked to prove the same thing twice.
Select Continue.
Step 2: SharePoint
Section titled “Step 2: SharePoint”Set your SharePoint site URL, save it, then start the environment preparation. Certaria verifies the site and builds your ISMS there.
This is the step that matters most later, so it is worth knowing what it creates. Wait for Environment is ready before moving on.
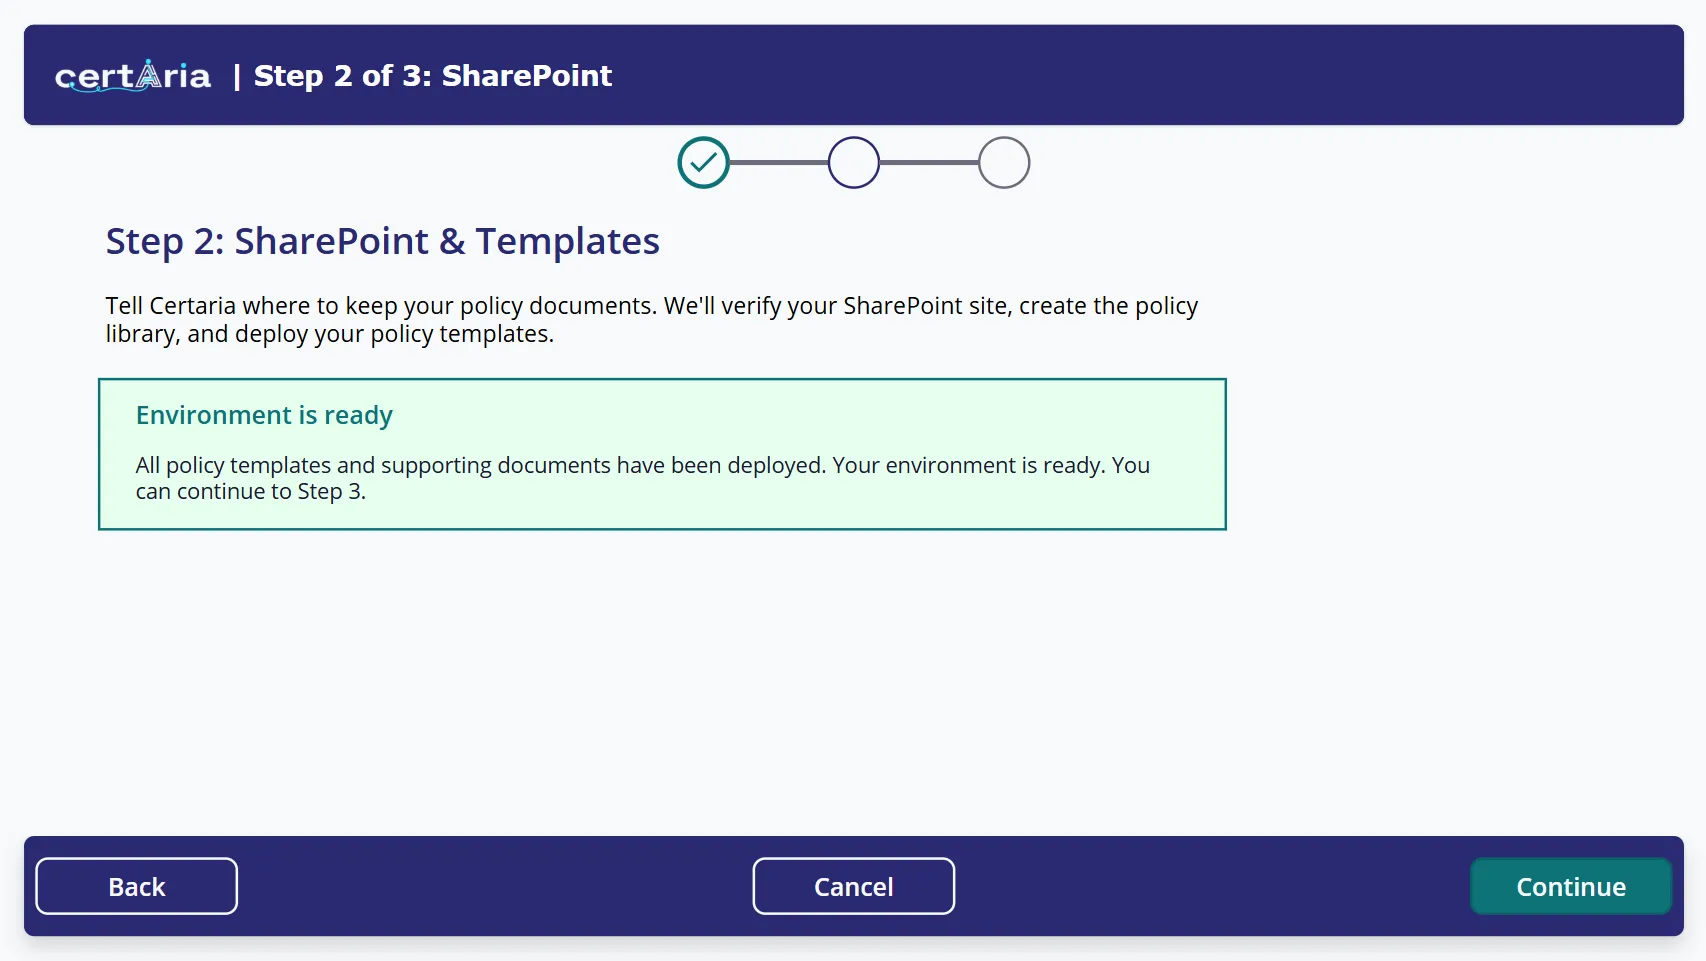 Preparation takes a couple of minutes. Continue only once you see this.
What Certaria builds
Section titled “What Certaria builds”Ten containers: your Policy Masters library and the Document Repository your people read from, the Published Documents and Acknowledgements lists, Concerns, Required Training and Training Records, and three administrator-only libraries for Exports, the Audit Pack and Evidence.
Your SharePoint site explains what each one is for and, more usefully, what is safe to change once it exists. One thing from it is worth knowing before you continue.
Step 3: your first Readiness Scan
Section titled “Step 3: your first Readiness Scan”- Select Save and run Readiness Scan. It reads your Microsoft 365 security data and grades you against the Annex A controls. The wizard tells you this may take up to two minutes.
- Read the four result tiles: Fully evidenced, Partially evidenced, Manual evidence required, and Microsoft Secure Score.
- Optionally set the notification timings: which account posts Teams messages, the daily reminder hour, the weekly acknowledgement slot, and whether the daily incident check runs.
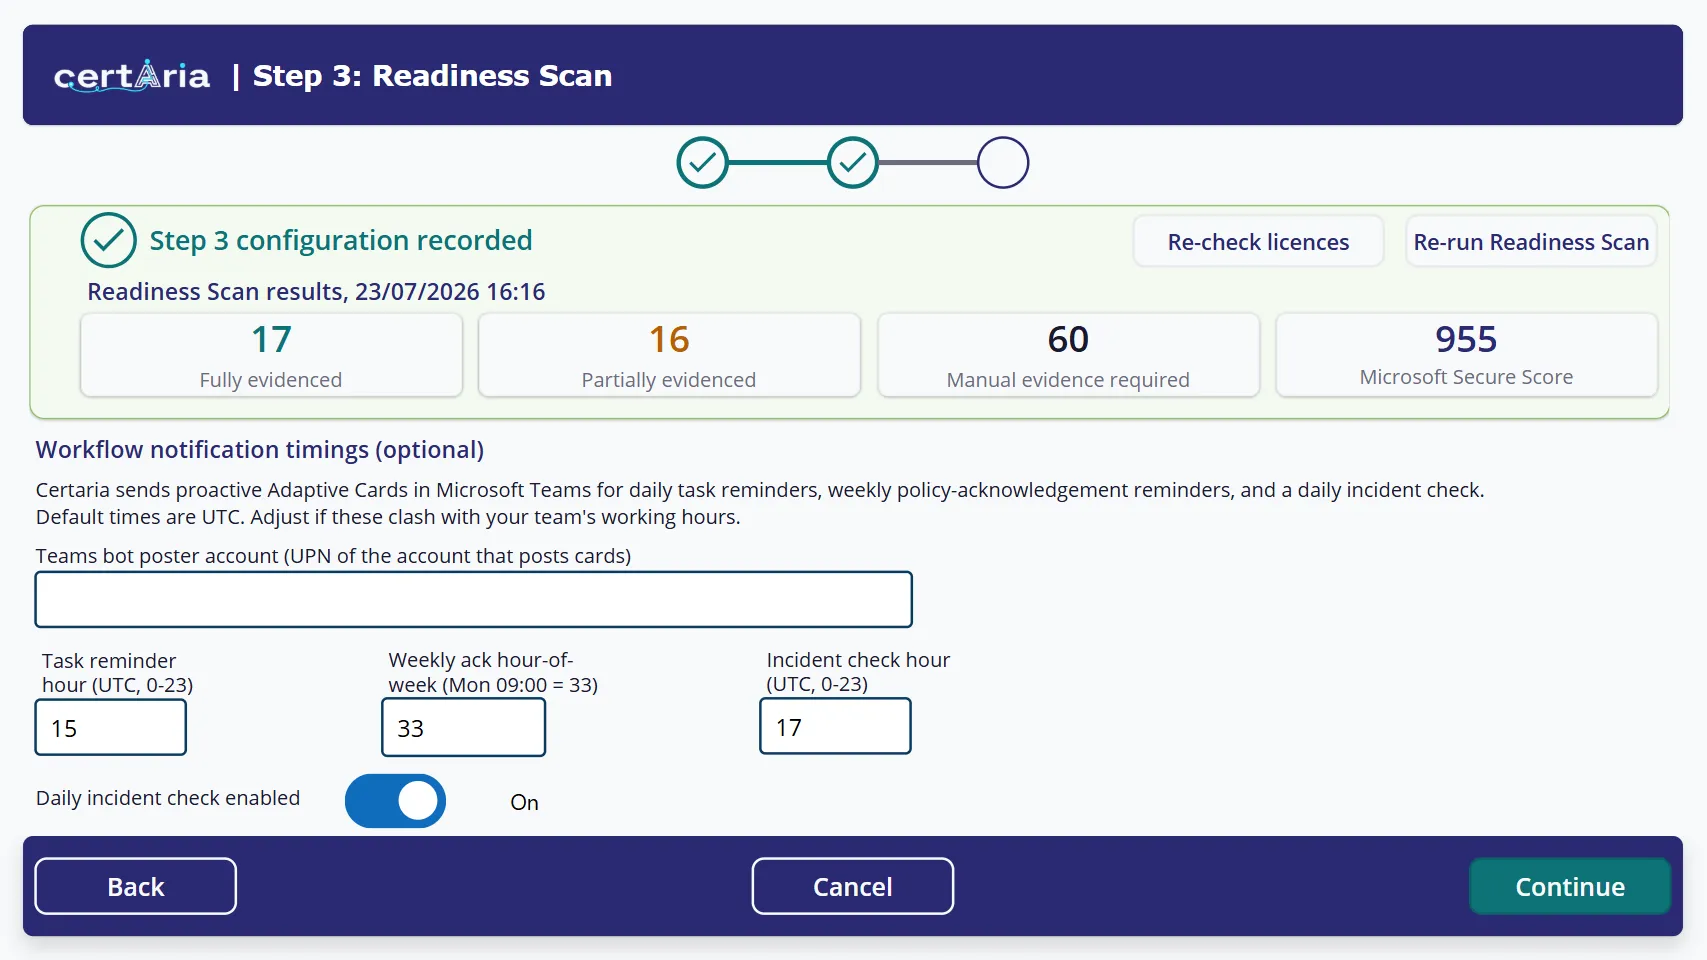 The first three tiles account for all 93 Annex A controls between them. Secure Score is Microsoft’s own number, carried through unchanged.
Select Continue.
Summary and finish
Section titled “Summary and finish”The summary screen shows your organisation, your Power Apps licence status, your Cyber Essentials record and your scan results. It stays available as a status screen you can return to.
Select Finish setup. Certaria records onboarding as complete and the hub becomes your daily home.
After the wizard
Section titled “After the wizard”Two things are worth doing immediately, because everything else depends on them:
- Set your access model. Certaria creates the containers; who can reach them is your decision and your auditor will ask about it.
- Import your people. A person with no linked user account receives no notification and appears in no reminder, silently.
Common failure modes
Section titled “Common failure modes”| Symptom | Cause | Fix |
|---|---|---|
| The wizard shows a sign in screen after Start setup | Expected. The wizard reloads itself after first launch setup | Sign in with the same account |
| Sign in opens a blank window | Your browser is blocking the Microsoft popup | Allow popups for apps.powerapps.com and make.powerapps.com, then reload |
| Power Apps licence not detected | Usually accurate: the signed in account has no Power Apps licence of any kind | Assign it in the Microsoft 365 admin centre, then re-check the licence from the wizard. It re-checks the licence only and leaves your scan results alone |
| Step 2 fails on the SharePoint URL | The site does not exist, or the account running the wizard cannot reach it | Confirm the URL opens in a browser for that account |
| A workflow shows as Off afterwards | Usually a transient activation failure | Turn it on in the solution’s cloud flows list. If it names a connection, sign that connection in first |
- Your first thirty days, for what comes after setup
- Who can see and do what, which you should set before anyone else arrives
- Publish a document